Van Solar Power Without the Headache
Adding solar power to a van can feel intimidating at first. You start researching and suddenly you’re buried in conversations about watts, volts, amp-hours, inverters, battery chemistry, and wire sizes. It can seem like you need an electrical engineering degree just to keep your refrigerator running.
The good news is that the basic system is much simpler than the terminology makes it sound. Solar panels collect energy from the sun, a charge controller regulates that energy, batteries store it, and an inverter allows you to use regular household appliances. Once you understand what each part does, planning a system becomes much more manageable.
The best place to start isn’t with the solar panels. It’s with the things you actually want to power.
Think through a normal day in your van. You may have a 12-volt refrigerator running around the clock, LED lights in the evening, a roof fan overnight, a water pump, phone chargers, and a laptop. If you work remotely, your laptop and internet equipment may be some of your biggest daily power users. Cooking appliances, electric heaters, air conditioners, and microwaves require considerably more energy.
You don’t need to calculate everything perfectly, but you should have a realistic idea of your daily use before buying equipment. Otherwise, you may spend thousands of dollars on a system that is either much larger than you need or too small to keep up.
For many travelers, a system with 300 to 600 watts of solar and 200 to 400 amp-hours of battery storage is a reasonable starting point. A weekend camper who mainly needs lights, a refrigerator, and phone charging may be comfortable at the lower end. Someone living and working in a van full time will probably want more capacity, especially if they travel during winter or spend time in cloudy areas.
Every van solar system has four main components.
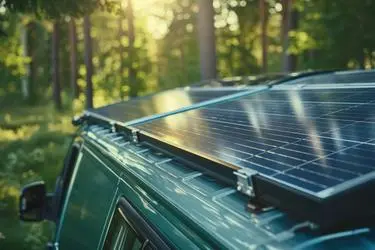
The solar panels are the most visible part. They collect sunlight and turn it into electricity. Monocrystalline panels are commonly used on vans because they produce more power within a limited amount of roof space. Before deciding how many panels to install, measure the usable area of your roof and account for vents, fans, air conditioners, antennas, and storage racks.
The charge controller sits between the panels and the batteries. Its job is to regulate the electricity coming from the roof so the batteries can charge safely. MPPT charge controllers are popular because they generally perform better as sunlight and weather conditions change.
The batteries store electricity for later. This is what allows you to use your lights, refrigerator, and electronics after sunset or when your van is parked in the shade. Lithium batteries are now common in higher-end builds because they are lighter, last longer, and provide more usable capacity than traditional lead-acid batteries. AGM batteries cost less upfront, but they are heavier and should not be regularly drained as deeply.
Finally, an inverter converts the 12-volt electricity stored in the batteries into the 120-volt electricity used by normal household outlets. You need an inverter if you want to plug in devices or appliances that cannot run directly from USB or a 12-volt connection. Larger inverters can support more powerful appliances, but those appliances can also drain a battery bank very quickly.
One of the biggest mistakes people make is planning around perfect solar conditions. A panel’s advertised wattage is its maximum output under ideal testing conditions. In the real world, clouds, trees, dirt, smoke, snow, roof equipment, and the angle of the sun can all reduce production.
Where and when you travel matters too. A system that easily keeps up during summer in Arizona may struggle during winter in Washington. Shorter days give your panels fewer hours to collect energy, and a low winter sun angle can reduce their output even further.
Parking also becomes part of the equation. You may want to park in the shade to keep the van cool, but your roof panels need direct sunlight. Portable panels can help with this problem because they can be placed in the sun while the van remains shaded. They take up storage space and require extra setup, but they can be useful for travelers who stay in one place for several days.
Solar also doesn’t have to be your only charging source. An alternator charging system can recharge your house batteries while you drive, which is especially useful in cloudy weather. Shore power allows you to plug in and recharge at a campground or home. Many full-time builds combine solar, alternator charging, and shore power so they aren’t dependent on one source.
You may be able to install part or all of the system yourself, but it’s important to be honest about your experience. Mounting panels, installing a charge controller, and working with basic 12-volt connections can be approachable DIY projects if you take the time to learn proper techniques.
Electrical mistakes can still damage expensive equipment or create a fire risk. Every circuit needs appropriately sized wiring and fuses, batteries need to be securely mounted, and any hole drilled into the roof needs to be properly sealed. Inverter wiring, 120-volt circuits, and alternator integration are often the points where bringing in a professional makes sense.
A good middle ground is to design the system and handle the simpler installation work yourself, then have an experienced installer complete or inspect the more complicated connections. A professional inspection can also catch loose terminals, undersized cables, poor grounding, and missing circuit protection before they become serious problems.
Cost varies widely depending on the size of the system and the components you choose. A smaller setup for weekend travel might cost around $1,500 to $2,500. A larger system using lithium batteries, a powerful inverter, and multiple charging sources can cost $5,000 or more. Professional installation and high-power appliances can increase that total considerably.
It’s possible to start small and expand later, but you should plan for expansion from the beginning. That may mean choosing a charge controller that can handle additional panels or leaving room for another battery. Spending slightly more on the right foundation can prevent you from having to replace major components later.
Some of the least exciting parts of the system are also the most important. Quality cables, properly sized fuses, secure panel mounts, reliable connectors, and a good battery monitor are essential. A battery monitor lets you see how much power you are using, how much remains, and whether the panels are actually keeping up. Without that information, you’re mostly guessing.
Maintenance is fairly simple. Keep the panels clean, check the mounting hardware, inspect the wiring for wear or corrosion, and pay attention to changes in performance. If your system suddenly stops charging normally, start by checking for shade, dirt, loose connections, and blown fuses before assuming an expensive component has failed.
Ultimately, the best solar system isn’t necessarily the largest or most expensive one. It’s the system that matches your travel style, your appliances, and the conditions you expect to encounter.
At Adventure Van Expo, you can compare working electrical systems, talk directly with installers, and see how other van owners have approached off-grid power. Walking through a few real builds can often teach you more than hours spent comparing specifications online.
Visit AdventureVanExpo.com to find an upcoming show, and follow @adventurevanexpo for more van builds, gear, and ideas from the road.